


Mini Program 3D Display: Rendered Images vs Real-Time Engines – What's the Difference, Delivery Time, and Where Does Rework Happen?
When creating a mini program 3D display, don't rush into modeling. In 2026 project delivery practices, there are only two mainstream paths: rendered image (static) or a real-time engine (e.g., WebGL/Three.js) embedded in the mini program. The two paths differ significantly in cycle time, cost, and interactive experience; choosing wrong often leads to rework. The conclusion: choose rendered image for static display, and choose a real-time engine if rotation or click interaction is needed. During delivery, focus on checking model accuracy, lighting and material parameters, file format, and load time.
Mini Program 3D Rendering: How to Choose Between Rendered Image and Real-Time Engine
According to common delivery practices in 2026, the main dividing line between the two approaches is interactivity. Rendered image is suitable for high-quality displays with fixed viewpoints and complex lighting, delivering images or panoramas; real-time engines are suitable for scenarios where users can drag, rotate, and click, delivering WebGL pages embedded in the mini program. In terms of cost, the experience range for rendered image is 3–7 days, while real-time engines take 1–3 weeks, but the latter has lower modification costs.
- Rendered image: Low per-frame cost, fast output, suitable for WeChat Moments posters and detail-page headers; however, the viewpoint is fixed and cannot be rotated.
- Real-time engine (Three.js/WebGL): Supports interaction; models require polygon reduction optimization; development cycle is longer; but later color changes or angle adjustments only need parameter tweaks, no re-rendering.
The criterion is simple: if users need to 'spin it around' on their phone, choose a real-time engine; if they only need a static view, rendered image usually saves money.
Why Does Mini Program 3D Always Rework During Rendering? Three Real-World Reasons
In project delivery, clients often get stuck on 'preview effect doesn't match reality'. For example, with a limited budget and only one product photo as reference, the modeler builds the model based on the photo, but after rendering, the material reflection is too strong, distorting the product. Our approach at the time was to use wireframe to verify proportions first, then adjust lighting parameters; in the end, although we didn't miss the deadline, we spent two extra days fixing materials—that's the cost of rework.
There are three common causes of rework:
- Model accuracy doesn't match the target platform: The mini program package is limited to 2MB; too many polygons cause slow loading, so you have to compensate with texture maps.
- Lighting and materials not calibrated for the delivery end: Rendered images use physically based rendering, while real-time engines use real-time GI; the two parameter sets are not interchangeable, and direct reuse results in color deviation.
- The requirements document doesn't define interaction boundaries: The client says "just make it rotatable," then adds zoom and exploded views, doubling the development cycle.
Acceptance criteria: the model must be restored proportionally to the real object, material textures clear, and viewpoint switching loads within 3 seconds (experience value) to be considered qualified.
Five-Step Verification Method for Mini Program 3D: A Checklist from Modeling to Launch
This is a workflow organized according to enterprise project delivery practices, designed to reduce rework. Each step has clear deliverables and acceptance points:
- Verify requirement boundaries: Confirm whether it's static or interactive display; list all required viewpoints and features; otherwise, everything downstream becomes chaotic.
- Plan model accuracy: Decide polygon count based on mini program package limits; commonly keep the main model under 100,000 polygons and use 1024×1024 textures.
- Choose the rendering path: Static goes with rendered image, dynamic goes with WebGL. Don't mix them, or lighting and materials will interfere with each other.
- Pre-render test: Run it on a real device or in developer tools; check loading speed, frame rate, and memory usage; fix issues early.
- Delivery acceptance: Verify model proportions, material parameters, interaction logic, and loading time against the checklist; only release final files after passing.
Why this division? Because most rework happens in steps 1 and 2—starting modeling without finalized requirements, then reducing polygons after exceeding limits. Key points for each step: for step 2, always test the reduced-polygon effect with a sample first; for step 4, don't just check on a computer—use a low-end device to test.
Mini Program 3D Delivery Formats and Acceptance Criteria
In 2026, common delivery formats fall into two categories: rendered image delivers JPG/PNG or panoramas, with source files including material parameters; real-time engines deliver glTF/GLB formats, embedded in mini programs using Three.js or Babylon.js. The acceptance criteria can be checked against the following list:
- Model proportion error within 5% of the real object (experience range);
- Material reflection and refraction parameters follow physical laws, not looking like a plastic illusion;
- After release on a real device, first-screen loading time does not exceed 3 seconds, and continuous interaction has no white screens;
- Color deviation across different iOS/Android devices is within an acceptable range; "it's fine on my computer" is not accepted.
For references, you can check the subpackage limits and performance guidelines in the official WeChat Mini Program documentation, and you can also refer to general WebGL rendering performance checklists.
Applicable Scenarios and Boundaries: Which Projects Should Not Use Mini Program 3D
Scenarios suitable for mini program 3D include product display, property models, digital human customer service, educational demonstrations, and other scenarios where users need to click and interact with the model. Unsuitable situations are also clear:
- Users just quickly view the image without clicking—simply use rendered image, which is cheaper; no need for a real-time engine.
- High-precision industrial-grade models are needed (e.g., car interiors)—mini program package limits apply; consider VR panorama or external links.
- The team has no front-end developer—real-time engines require coding, not just art rendering.
Boundary judgment: if interaction complexity is lower than 'rotate + zoom', using a real-time engine is wasteful. If the model exceeds 1 million polygons, reduce polygons before discussing display.
Frequently Asked Questions
How long does mini program 3D rendered image typically take?
Static rendered image typically takes 3–7 days, including modeling and material adjustment; if the model is simple and assets are ready, it can be done in 2 days.
Why do mini program 3D quotes vary so much?
The price difference mainly lies in interaction complexity, model accuracy, and number of revisions. Real-time engines are about twice as expensive as rendered image, but later revision costs are lower.
Are modeling and rendering done by the same team?
The common practice is to separate them: modelers handle the model structure, renderers handle lighting, materials, and output. Small projects may have one person do both, but delivery should clearly define the division of interfaces.
Should mini program 3D use glTF or GLB?
The two formats are essentially the same; GLB is the binary packaging of glTF and is smaller in size. In 2026, GLB is more commonly used in mini programs because it loads faster.
What are the differences in rework points between rendered image and real-time engine?
Rendered image rework mostly happens in lighting and material color adjustment; each image change requires hours of re-rendering. Real-time engine rework mostly happens in interaction logic and performance optimization; changing code is faster than re-rendering.
Action guideline: first clarify whether users need interaction, then choose the rendering path. For static display, directly find a rendered image team; for interaction, be sure to reserve front-end debugging time. The numbers above are experience ranges; specific figures depend on project requirements. It is recommended to confirm item by item with the 'Five-Step Verification Method' before starting, which can save half of the modification cost.
-
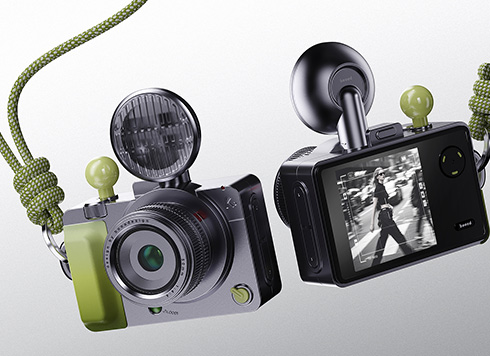 EDC·Trendy Camera Product Design: Form Follows Emotion
EDC Toy Camera: Braun-inspired retro design ...
-
 Product Design of Children's "Bubble Rocket" Underwater Thruster
Inspired by "Octonauts + Space", kids' "Bub ...
-
 Design of Adaptive Intelligent High-Altitude Shuttle Transport Robot
Smart rural shuttle bot: Streamlined, weath ...
-
 "Effortless" Exoskeleton Wear: Unleash Ultimate Freedom in the Sea
"Unfelt Wearability" & "Bionic Power" redef ...
-
WebGL for 3D Display: How Much Do Rendered Images and Real-Time Engines Differ? 2026 Delivery Timelines and Rework Points
Date: Aug 23, 2026 Read: 94
-
Web 3D Product Display: Rendered Images or Real-Time Engine? Delivery Cycles and Rework Points Compared
Date: Aug 19, 2026 Read: 125
-
How Long Does a 3D Aerial View Rendering Take? Is Rework Usually Caused by Modeling Dimensions?
Date: Aug 29, 2026 Read: 94
-
Rendering Keeps Getting Revised: Is the Main Issue Modeling or Materials and Lighting?
Date: Aug 28, 2026 Read: 101
-
A Complete Guide to Mini Program 3D Production: From Modeling to Rendering Delivery Standards
Date: Jul 27, 2026 Read: 130