

A Web 3D Booth Is Already Live, and the Client Suddenly Wants an A2 Poster: Can a Browser Screenshot Go Straight to the Printer?
Quotable conclusion: Whether a direct screenshot from a web 3D scene can be sent to print is not judged by whether it looks clear, but by whether the output pixels and color mode meet the printer's or large-screen requirements. In 2026, common web canvases are mostly between 1920×1080 and 2560×1440, while A2 at 300 dpi needs about 4961×7016 pixels, and A3 needs about 3508×4961 pixels. If you take a screenshot and enlarge it directly, text, thin lines, and material textures tend to break down first; external print usually requires supplemental offline rendering or a high-resolution real-time sequence, while web-only viewing does not require extra re-rendering.
The problem is usually the pixel source, not model precision
A web 3D screenshot captures canvas or screen pixels, and its ceiling is limited by canvas size, GPU, and browser—it is not unlimited resolution. No matter how detailed the model and textures are, if the canvas is only 1920 wide, printing to A3 will still stretch it. In practice, you should work backward from the finished size to the required pixels, not output based on the web display size.
- Common web canvases: 1920×1080 and 2560×1440 are more common; a few devices can reach 3840×2160.
- Common print standard: 300 dpi; A4 is about 2480×3508 pixels, A3 is about 3508×4961 pixels—check the printer's specifications for the exact numbers.
- Large screens or trade shows: determine by the screen's physical pixels and viewing distance, not just by how it looks on a computer monitor.
- Enlarged screenshots: software interpolation adds fake pixels, edges look soft, and textures blur into a single mass.
First separate the use: screen, print, and large screen are three different lines
For the same web 3D scene, different delivery uses require completely different output specifications. In 2026, the three common lines are: viewing within a web page or mini-program, print materials, and large-screen or trade show screens. Mixing the three together often means discovering only at delivery that the resolution or color is wrong.
- Web viewing: prioritize package size and frame rate; the canvas just needs to be sufficient, and offline rendering is usually not needed.
- External print: prioritize resolution, color mode, and bleed; offline rendering or high-resolution sequences are often required.
- Large screen or trade show: prioritize physical pixels, brightness, and color accuracy, and also consider on-site ambient light.
If it is only for web display or internal review, supplemental offline rendering is often unnecessary; once it needs printing, a 4K large screen, or external promotional materials, you should re-output according to the target size rather than forcing it with a screenshot.
Work backward from output: five checks
A more stable approach in projects is to work backward from the output end to the rendering end. Once output requirements change, earlier rendering parameters must change with them; aligning output first reduces rework.
- Align output size and dpi: first confirm the printer's or large screen's pixels, bleed, and safe area.
- Align rendering path: choose offline rendering, high-resolution real-time sequences, or pixel-stream capture—cost and schedule differ.
- Align color and color space: web commonly uses sRGB, print commonly converts to CMYK; confirm with proofs or soft proofs before and after conversion.
- Align texture resolution: if model textures are only 1K, they tend to break down first when enlarged to print size; re-exporting at 2K or 4K is often needed.
- Align sharpness and post-processing: after high-resolution output, sharpen and denoise separately, and deliver TIFF or high-quality PNG or JPG.
If step 1 is not confirmed, everything later must be redone; for step 3, do not rely only on the monitor—check against the printer's proof or specifications; for step 5, do not over-sharpen, or print grain becomes more obvious.
Where delivery usually gets stuck: constraints, approach, and cost
A common project situation: a web 3D booth is already live, and the client suddenly wants two A2 posters with only about two days left. The source model is available, but the web textures are mostly 1K to 2K, and the canvas is configured at 1920 wide. The approach: first get the printer's 300 dpi, bleed, and CMYK requirements, use the original project for supplemental offline rendering, output from the poster viewpoints, then lay out text and logos separately—do not use direct browser screenshots. The result: two A2 images have a typical range of about 1 to 3 working days; if the textures are only 1K, you need to replace them at the modeling end with 2K or 4K and re-render, adding about 0.5 to 1 day. If you send direct screenshots to the printer, they are often rejected, delaying about 1 to 2 working days—that is the cost.
- Using browser screenshots and enlarging them directly;
- Textures with lower resolution than the output size;
- Delivering to the printer without color space conversion;
- Real-time and offline reflection effects differ, so the image changes more than expected;
- Over-sharpening in post, causing white edges or grain in print.
Comparing options: screenshots, offline rendering, and high-resolution real-time sequences
The three paths do not replace one another; they divide work by use. In 2026, a common judgment is whether the deliverable is for a screen or paper, and whether interaction is needed.
- Web 3D screenshots: low cost, turnaround measured in hours; resolution is limited by the canvas, suitable for internal communication, web thumbnails, and previews; not suitable for print or high-precision large screens.
- Offline rendering: medium to high cost; for a single image or a small number of viewpoints, the experience range is about 1 to 3 working days, longer for complex scenes; color and resolution are controllable, suitable for print, posters, and approvals; not suitable for scenarios requiring real-time interaction.
- High-resolution real-time sequences: cost and schedule are in the middle, with an experience range of about 1 to 2 working days; suitable for promotional videos and large screens, but color and sampling ceilings are usually lower than offline rendering, so check before printing.
If a project needs both web interaction and print materials, a common approach is to share one model but use two output lines: the web side uses reduced polygons and compression, while the print side keeps high-poly models and high-resolution textures—do not compromise one for the other.
Applicable and non-applicable boundaries
Applicable: web 3D is already done, and the client also needs printed posters, display boards, large-screen images, or external proposal documents; or the image has lots of text, thin lines, and material textures that look clearly soft when screenshots are enlarged. For these projects, supplemental offline rendering or high-resolution re-rendering is usually worth it.
Not necessary: when it is only for web viewing, only internal discussion, the concept is still at a rough model stage, or the client has no paper or large-screen clarity requirement, the investment in supplemental offline rendering often cannot be recovered. If the delivery use stops at the screen, there is no need to redo it to print standards; once the output must leave the screen, check it against paper or large-screen standards.
- Suitable: print, large screens, trade shows, external promotional materials.
- Not necessary: web display, internal review, low-precision sketches, temporary communication.
- Use caution: when budget is tight and the schedule is short, first confirm whether the printer can accept lower dpi or a reduced format, then decide the rendering workload.
FAQ
When a web 3D screenshot is enlarged directly for print, what usually breaks down first?
Usually text and thin lines break down first, followed by material textures and edges. The reason is that screenshots are limited by canvas pixels, and software interpolation cannot create real detail—the more you enlarge, the more obvious it becomes.
How long does supplemental offline rendering usually take, and how much does it cost?
The experience range is commonly 1 to 3 working days for a single image, and 3 to 5 days for complex scenes; cost is several hundred to several thousand RMB per image, depending on the scene, resolution, and post-processing. Check against specific project constraints.
Can a web-side model be used directly for offline rendering?
Usually it can be reused, but you need to check units, materials, and texture resolution. Web-optimized reduced-polygon versions may have lower-resolution textures, and before printing you often need to switch back to high-poly models or high-resolution textures, otherwise there will not be enough detail.
If it is only for web viewing, do I still need supplemental print images?
Generally not. Prioritize the budget for polygon reduction, compression, and real-device debugging; only when the output must leave the screen should you re-render to print or large-screen standards.
What format and color are usually required for print delivery?
Commonly TIFF or high-quality PNG or JPG, converted to CMYK according to the printer's requirements with bleed included; save web images separately in sRGB, and do not mix the two.
If in 2026 a project needs both web 3D display and print or large-screen output, it is advisable to lock the output size, color mode, and delivery format before scheduling rendering, then decide whether supplemental offline rendering is needed; for web-only viewing, it is more appropriate to spend the budget on polygon reduction, compression, and real-device debugging. The above turnaround times and costs are all experience ranges; check specific project constraints and printer specifications for exact requirements.
-
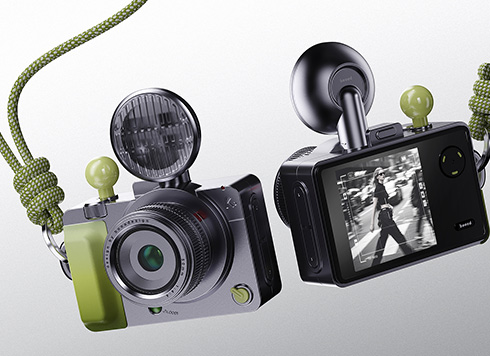 EDC·Trendy Camera Product Design: Form Follows Emotion
EDC Toy Camera: Braun-inspired retro design ...
-
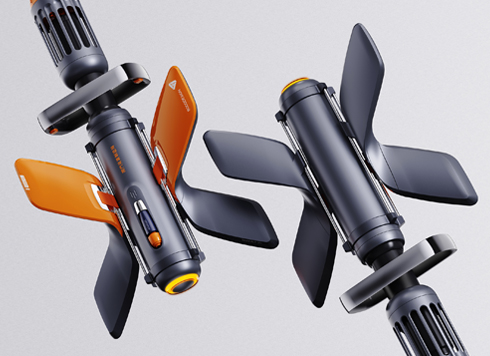 Product Design of Children's "Bubble Rocket" Underwater Thruster
Inspired by "Octonauts + Space", kids' "Bub ...
-
 Design of Adaptive Intelligent High-Altitude Shuttle Transport Robot
Smart rural shuttle bot: Streamlined, weath ...
-
 "Effortless" Exoskeleton Wear: Unleash Ultimate Freedom in the Sea
"Unfelt Wearability" & "Bionic Power" redef ...
-
Why does mini-program 3D start smooth on a budget Android phone but get hot and drop frames after two minutes?
Date: Oct 14, 2026 Read: 7
-
In product demo animation, prototype still frames look premium, but the final video moves like PPT slides—should you add motion previews first or increase render precision?
Date: Oct 13, 2026 Read: 10
-
In web 3D, glass curtain walls and railings flicker at oblique angles—should you merge coplanar geometry first or adjust the camera near/far clipping planes first?
Date: Oct 12, 2026 Read: 19
-
Three.js 3D Animation on a Showroom Touchscreen: Can It Stay Stable for a Full Day Offline Without Restart?
Date: Oct 11, 2026 Read: 26
-
Client says your UE5 render looks like a game screenshot: adjust post-processing first or change the reflection source first?
Date: Oct 10, 2026 Read: 36