



UE5 interior walkthrough: client wants to change materials or plan on site—can frame rate stay stable with Lumen on?
In UE5 interior walkthroughs, when the client asks to swap wall materials or furniture plans on site while Lumen is on, whether the frame rate stays stable—based on common 2026 delivery experience—depends less on whether the toggles are right and more on whether the 'editable range' was converted into a performance budget during the build stage. The more reliable order is: lock the demo machine and resolution first, put editable items into material instances and plan switches, then reduce translucency and material complexity and adjust resolution scaling, and only then change Lumen's reflection quality. Conversely, if you turn off global illumination right away, dark areas collapse into a flat gray, and restoring the directional feel of indirect light on site becomes very difficult.
Where does Lumen's cost mainly sit in interior walkthroughs?
Lumen is UE5's dynamic global illumination and dynamic reflection solution. Indirect light in interior spaces mainly comes from windows, light fixtures, and wall and floor bounces; once it is off, only direct light plus baked fallback remains, and wall corners, ceiling reflections, and the undersides of furniture lose light directionality. The image looks flat and gray, and clients easily say it looks fake.
But its cost is not concentrated in the ray tracing toggle. Glass overlay layers, translucent vegetation, the number of movable lights, and material instruction counts often affect frame rate more than lowering Lumen from high to medium. In experience range terms, combining three glass layers into one in the same scene and replacing distant vegetation with low-cost stand-ins commonly reduces GPU time by 20% to 40%.
- Dynamic indirect light: the source of wall bounces and window light bleed; when off, dark areas easily become dead black or flat gray.
- Dynamic reflections: the source of rough and mirror reflections; when off, metal and glass look closer to plastic.
- Translucency and materials: the more on-site editable items there are, the more material branches tend to stack; this type of cost is often underestimated.
If materials can be changed on site, the performance budget has to be allocated in advance
Changing materials on site means materials must be parameterized: wall colors, wood grain, and fabric must be attached to material instances and take effect immediately after changes, without relying on re-baking. The way to judge is to first confirm the editable list: if only colors and textures change, both cost and performance are relatively controllable; if furniture models or layouts need to change, hidden and replacement slots must be reserved, and both frame rate and schedule will rise.
A common approach is to write the editable range into the acceptance criteria—for example, 5 to 8 material instance parameters can be changed on site, and anything beyond that goes through version iterations. Writing it clearly is easier than firefighting on the spot, and it also prevents the client from assuming everything can be swapped at will.
Three-tier downgrade comparison (experience range)
Different projects can accept different degrees of 'fakeness.' Making downgrades into tiers and letting the client choose between image quality and smoothness is easier to agree on than the production side unilaterally turning off lighting.
- Quality-preserving tier: native resolution, Lumen high, editable items limited to colors and textures; suitable for demos with fixed desktop machines and fixed camera routes.
- Balanced tier: resolution scaling about 67% to 80% (experience range), Lumen medium-high, reflections supplemented with screen space; most interior walkthroughs that need on-site material changes fall into this tier.
- Performance tier: keep Lumen global illumination, switch reflections to reflection captures, replace translucent vegetation with stand-ins; suitable when demo machine performance is uncertain and the client brings their own laptop.
There is also a fallback approach: baked lightmaps plus precomputed reflections, leaving only a small amount of dynamic light. It basically conflicts with on-site material changes: one change requires one re-bake, and the delivery pace drags out, so many projects would rather keep Lumen global illumination and only lower the reflection tier than go this route.
At the delivery site: the performance budget must be allocated at the modeling stage
I have encountered a situation like this: the deadline was compressed to about a week, the model was provided upstream, and glass, translucent plants, and fog effects were stacked three or four layers deep. It ran smoothly on the development machine, but with Lumen on the client's laptop it only had just over twenty frames per second, and the client still required changing fabric colors on site. A common approach is to first count the number of translucent layers and materials, merge glass materials, replace distant vegetation with stand-ins, switch fog to a lightweight solution, then solidify walls and fabric into material instances, and only then adjust resolution scaling. The cost is that textures must be reimported once and lighting recalibrated once, and the schedule commonly slips by one to two days (experience range). If it is left until the day before delivery, usually only turning off Lumen remains, and both image quality and editable range shrink.
Applicable and non-applicable boundaries
Projects suitable for UE5 real-time walkthrough with Lumen kept on are usually model apartments, showrooms, and interior proposal reviews that need free camera movement, multiple plan switching, and on-site Q&A, and the demo machine configuration can be confirmed at the build stage. Conversely, projects that only output fixed-angle stills and only need approval or printing are easier with offline rendering; if the demo machine is an old laptop with integrated graphics and 4K smoothness is required, Lumen and high resolution are hard to satisfy at the same time, so the tier and resolution should be written into the acceptance criteria in advance. Another situation is easy to overlook: if the space itself has almost no indirect light, such as an open outdoor white model or a pure product display stand, the benefit of dynamic global illumination is limited, and investing the performance budget in reflections and material detail makes it easier for the client to see the difference.
Common questions
If materials are changed on site, does each change require repackaging?
Changing material instance values does not require repackaging; it takes effect directly. But if the material structure is changed or new textures are added, repackaging and another stress test are required. These two categories must be distinguished before work starts.
Can Lumen and baked lighting be used half and half?
Yes. A common approach is to use baked lighting for the main space and leave dynamic light for local areas that need on-site lighting changes; brightness at the seams should be checked once, otherwise layering is easy to see at the boundaries.
If the client brings their own laptop, what resolution and frame rate should be used to estimate performance?
Estimate at 1080p with medium settings and leave margin; do not estimate based on the development machine. For on-site operation, above 30fps is commonly acceptable, 60fps is a bonus, and if only recording video, it can be locked at 24 to 30fps.
If the image turns gray after turning off Lumen, can it be fixed in post?
A little contrast and color tone can be added, but the directional feel of indirect light cannot be restored; the more reliable approach is to keep Lumen global illumination and only lower the reflection tier.
Where does the price difference come from—modeling or on-site tuning?
The difference mostly comes from modeling precision, material count, and packaged stress testing. On-site tuning often accounts for 20% to 30% of total labor hours (experience range), and the more editable items there are, the more this part moves to the front.
If the project has already confirmed an on-site demo, the more reliable approach is to obtain the actual configuration of the demo machine in advance, run a stress test with the packaged build at 1080p first, and then set the Lumen tier and resolution scaling. Projects that only output video or only need approval are usually easier with offline rendering. Based on 2026 delivery habits, Xiyue Company in these types of projects puts stress testing and editable-list confirmation before image output, to avoid discovering on the last day that performance is insufficient.
-
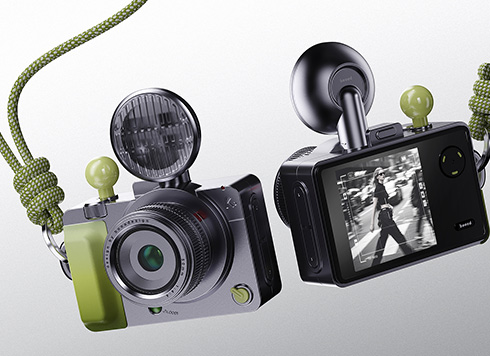 EDC·Trendy Camera Product Design: Form Follows Emotion
EDC Toy Camera: Braun-inspired retro design ...
-
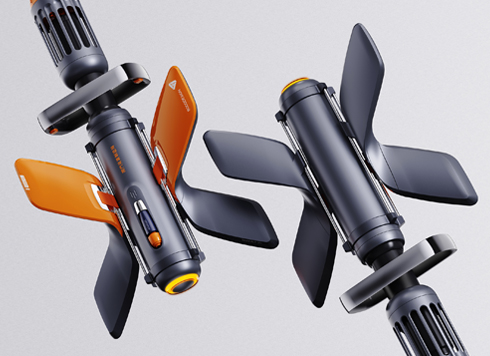 Product Design of Children's "Bubble Rocket" Underwater Thruster
Inspired by "Octonauts + Space", kids' "Bub ...
-
 Design of Adaptive Intelligent High-Altitude Shuttle Transport Robot
Smart rural shuttle bot: Streamlined, weath ...
-
 "Effortless" Exoskeleton Wear: Unleash Ultimate Freedom in the Sea
"Unfelt Wearability" & "Bionic Power" redef ...
-
Why does mini-program 3D start smooth on a budget Android phone but get hot and drop frames after two minutes?
Date: Oct 14, 2026 Read: 7
-
In product demo animation, prototype still frames look premium, but the final video moves like PPT slides—should you add motion previews first or increase render precision?
Date: Oct 13, 2026 Read: 10
-
In web 3D, glass curtain walls and railings flicker at oblique angles—should you merge coplanar geometry first or adjust the camera near/far clipping planes first?
Date: Oct 12, 2026 Read: 19
-
Three.js 3D Animation on a Showroom Touchscreen: Can It Stay Stable for a Full Day Offline Without Restart?
Date: Oct 11, 2026 Read: 26
-
Client says your UE5 render looks like a game screenshot: adjust post-processing first or change the reflection source first?
Date: Oct 10, 2026 Read: 36