




Rendering Noise in Shadows and Glass: Should You Add Samples or Turn On Denoising First to Avoid Wasting Time?
Noise in rendering is not a single problem. Sorting out the source before making changes is usually more time-efficient than immediately adding samples or maxing out denoising. In experience, large areas of color speckles in shadows are often related to indirect light sampling; fine white dots on glass and metal are often related to light sampling and reflection sampling; and an even, fine sandy texture across the whole image often comes from denoising residue or over-sharpening in post. Based on common 2026 delivery habits, do one three-layer locating pass first, then decide whether to add samples or turn on denoising. In many cases this reduces rework from a full re-render to a local re-render.
Noise in Rendering Is Actually Several Different Things
Treating noise as one whole is a common misjudgment in rendering. In the same image, the grain in dark corners, glass reflections, shadow edges, and large flat color walls has different causes and corresponds to different parameters. Change the wrong thing, and you may render all night without getting clean; it can also mislead people into thinking the renderer or the machine is not good enough.
The reason to classify first is that render time is almost tied to sample count. A common situation is that 90% of the image is already clean, but a small piece of glass or a backlit corner still has grain. Doubling global samples then means making the whole image run along for one small area, and the schedule cost is hard to explain to the client.
- Indirect light noise: Mostly appears in backlit wall corners, ceilings, and deep corridors; when zoomed in, it looks like color speckles.
- Light sampling noise: Concentrated near direct sun edges, area lights, and IES fixtures; usually fine white dots with a slight flickering feel.
- Reflection and refraction noise: Snow-like grain in glass curtain walls, mirror stainless steel, and water surfaces; more obvious when the angle changes.
- Depth of field and blur noise: Grain in lens blur areas and around dynamic entourage people.
- Post and compression noise: Denoising residue, over-sharpening, and blocky color artifacts from JPG compression.
A Reusable Three-Layer Locating Method
The reason to break it into position, light source, and parameters is that these three can verify each other. Looking only at a parameter table traps you into increasing whichever value is low, while position and light source information can tell you in return which one to change. Finally, verify with a small test render, so you do not finish the whole image before discovering the direction was wrong.
- Layer 1: look at position: Zoom the rendered image to 100%–200% and judge whether grain is concentrated in shadows, reflective surfaces, or highlight edges.
- Layer 2: look at light sources: Check which lights actually matter in the scene—sun and sky, environment map, area lights, self-illuminated surfaces—and confirm which type accounts for more.
- Layer 3: change parameters: According to the locating result, adjust only the corresponding item, such as indirect light samples, light samples, reflection samples, or clamp value. Change only one category at a time so you can trace back.
- Add a small test render: Render only a small area with heavier noise, confirm the direction is right, then render the full image. This step usually saves several times the time of a full re-render.
Note that setting the clamp value too low will flatten highlights, and glass and stainless steel will lose their transparency. Such parameters are suitable for small incremental testing, not one-shot adjustment. When unsure, check the renderer official documentation sampling notes item by item; it is safer than adding parameters by feel.
The Time Cost of Three Paths: Adding Samples, Turning On Denoising, and Local Re-rendering
For the same noise problem, the cost structure of the three paths differs considerably. Which one to choose depends on the noise location and final output size, not on which sounds more advanced.
- Increase samples: Single-frame time roughly rises with sample count; it commonly reaches 1.5–3 times the original before clear improvement appears (experience range). It is worth it only when the direction is right.
- Turn on denoising: The added render time is usually limited, but if the strength is too high, it first erases high-frequency details such as wood grain, fabric weave, and brushed metal; glass reflections also become blurry.
- Local or layered re-render: Raise samples separately only for glass reflective surfaces and shadows, then composite. The time is often one level lower than a full re-render, at the cost of a more cumbersome process and time reserved for compositing.
- Switch engines or redo the whole round: The cycle basically starts over, and it is only worth it when material logic or interaction requirements change. Switching tools just for noise is usually not cost-effective.
To judge what counts as acceptable, check at 100% of the final output size: no visible color speckles in shadows, glass reflections continuous and not flickering, and material textures still distinguishable in highlight transition zones. If the final image is only viewed on a phone, these standards can be relaxed appropriately.
A Common Delivery Bottleneck: Which Version to Render First When Time Is Short
A common project constraint is: only one design version, schedule compressed to two or three days, images first used for internal presentation, and the viewpoint may still change later. A common practice is to first produce a small low-sample image with light denoising to align composition, color tone, and material direction. After final approval, re-render at final size and raise samples separately for glass and shadows. The cost is one extra round in the process; the benefit is that a viewpoint change from the client will not invalidate the whole image. Based on common 2026 delivery experience, this small-image-first, final-render-later approach usually adds one round of communication compared with going straight to a high-sample full image, but it reduces the probability of invalidating the whole image.
Conversely, if you render the full image at high samples from the start and the client changes the composition, the previous hours of rendering are basically wasted. I have also seen schedules so tight that denoising was set rather high, resulting in stone textures and glass reflections blurring together; when the client zoomed in and said the materials were lost, the only option was to go back to rendering and output again. Clarifying output size, viewing method, and revision rounds in advance is less troublesome than explaining after rendering. When we take on rendering delivery, we also usually align expectations with a small image first, then set the final sample level.
Acceptance Criteria: What Counts as Cleanly Rendered
Acceptance needs checkable criteria; otherwise clean it up a bit more becomes endless back-and-forth. The following are checks you can self-review before delivery; compare them item by item against your team own delivery acceptance checklist.
- Shadows: Viewed at 100% at final output size, no color speckles or obvious flicker.
- Reflective surfaces: Reflections on glass, metal, and water are continuous, with no snow-like dots or blocky patches.
- Material details: Wood grain, fabric weave, and brushed lines remain distinguishable in light-dark transition zones and are not flattened by denoising.
- Large flat colors: Sky and white walls have no color banding or obvious compression blocks.
- Multi-angle consistency: Grain levels are similar across different views of the same scene, with no angle that is obviously dirtier.
Applicable Scenarios and Boundaries
Investment in noise handling should match output size and viewing method. If this is not made clear in scheduling and quotes, disputes are likely later. Situations that justify spending more time chasing cleanliness include: stills for bidding or design review, interiors and night scenes where indirect light dominates, commercial spaces with many curtain wall and mirror materials, and images that need to be zoomed in or printed.
Situations that do not need high samples are equally clear: sketch-level communication only for scheme comparison and discussing layout and massing, where low samples plus light denoising is enough; images only quickly reviewed on a phone or meeting room projector without zooming in; and interactive demonstrations made with real-time engines, where denoising and temporal anti-aliasing follow a different logic and cannot simply copy offline rendering thinking.
FAQ
How long does one frame of rendering usually take?
The experience range varies a lot: a single frame for screen presentation is commonly from teens of minutes to an hour; 4K and above, night scenes, or scenes with heavy indirect light can reach several hours, depending on machine configuration, scene complexity, and sample level.
How is rendering usually quoted?
It is commonly estimated per image combined with scene complexity; a single image can range from a few hundred yuan to several thousand yuan (experience range). Whether modeling, lighting and materials, and revision rounds are included directly widens the gap. It is best to write the scope clearly before starting.
Are modeling and rendering done by the same people?
A common practice is division of labor: modeling handles geometry, units, and UV conventions; rendering handles lighting, materials, and output. Division of labor is fine, but units, coordinate systems, and naming should be unified first; otherwise changing one place affects both sides.
What formats are usually delivered for rendering?
JPG or PNG is common for presentations; TIFF or layered PSD is common when post layout or printing is needed. Whether source files and render projects are delivered together depends on the project agreement; best to confirm before starting.
Will high denoising strength erase material textures?
Yes, and it tends to erase high-frequency details such as wood grain, fabric weave, and brushed lines first. A common practice is two passes of light denoising with a small radius, and zooming in to confirm material details are still distinguishable.
Next time the client says the shadows look a bit dirty, you can first go through the three-layer locating method: look at position, look at light sources, then change only one category of parameters, and use a small image to confirm the direction. When it is only for scheme communication and there is only one viewpoint, low samples plus light denoising is usually enough; for images used for review or printing, reserve time for local re-rendering. Write the cycle, revision rounds, and output size clearly in the contract according to actual scene complexity.
-
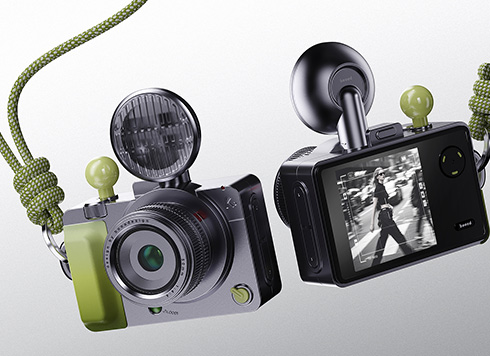 EDC·Trendy Camera Product Design: Form Follows Emotion
EDC Toy Camera: Braun-inspired retro design ...
-
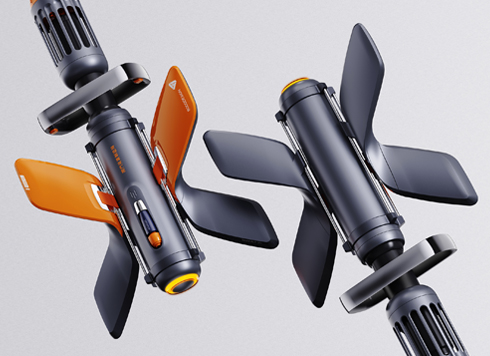 Product Design of Children's "Bubble Rocket" Underwater Thruster
Inspired by "Octonauts + Space", kids' "Bub ...
-
 Design of Adaptive Intelligent High-Altitude Shuttle Transport Robot
Smart rural shuttle bot: Streamlined, weath ...
-
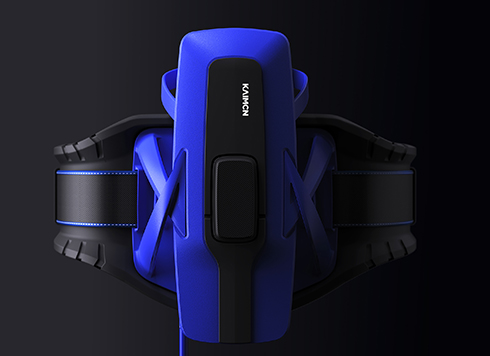 "Effortless" Exoskeleton Wear: Unleash Ultimate Freedom in the Sea
"Unfelt Wearability" & "Bionic Power" redef ...
-
Why does mini-program 3D start smooth on a budget Android phone but get hot and drop frames after two minutes?
Date: Oct 14, 2026 Read: 7
-
In product demo animation, prototype still frames look premium, but the final video moves like PPT slides—should you add motion previews first or increase render precision?
Date: Oct 13, 2026 Read: 10
-
In web 3D, glass curtain walls and railings flicker at oblique angles—should you merge coplanar geometry first or adjust the camera near/far clipping planes first?
Date: Oct 12, 2026 Read: 18
-
Three.js 3D Animation on a Showroom Touchscreen: Can It Stay Stable for a Full Day Offline Without Restart?
Date: Oct 11, 2026 Read: 25
-
Client says your UE5 render looks like a game screenshot: adjust post-processing first or change the reflection source first?
Date: Oct 10, 2026 Read: 36