



WebGL product 3D display: metal and glass keep looking like plastic—bake environment maps first or use real-time reflections to avoid rework?
Conclusion first: In WebGL product 3D displays, metal and glass often feel like plastic or look gray. The common cause is not that the model is too low-detail, but that the reflection data source and the performance budget do not match. Based on 2026 project delivery experience, a safer judgment is: for products with a basically fixed camera and only static display, prioritize HDR environment maps with controlled highlights; only when viewers must orbit the product and reflections need to change with viewpoint is real-time reflection worth using. The former is more stable on mobile; the latter is more likely to crush frame rate before the deadline.
Why metal and glass often give themselves away in web 3D
Under the rules of the Metallic Workflow, a metal surface has almost no diffuse reflection; the color it shows comes almost entirely from the environment it reflects. Glass, meanwhile, depends on reflection, refraction, and edge brightness at the same time. What runs in the browser is not the path tracing of an offline renderer. Once reflection data is missing, metal turns black or gray, and glass degrades into a piece of plastic.
What is trickier is that these two material types have different sensitivity to performance. Metal needs environment detail; glass needs refraction and multi-layer reflection. On mobile GPUs, both are usually expensive operations. So the real problem to solve is not simply turning reflection parameters up, but deciding who should provide this reflection.
- Metal looks gray or black: usually due to a missing environment map or insufficient intensity, not because metalness has not been pushed high enough.
- Glass looks like plastic: often because refraction is turned off and replaced only with transparency, with no brightness change at the edges.
- Dirty spots or streaks on the surface: mostly related to insufficient environment map resolution or over-compression.
- Reflections suddenly jump when rotating: often because real-time reflection update frequency is too low, or resolution has been reduced too aggressively.
A practical three-stage reflection decision process
This order is arranged by 'settle the high-certainty items first, then the expensive ones.' Defining the camera movement range first avoids turning on a pile of real-time features for effect when no one is actually rotating the view. Post-processing is placed last because it multiplies the performance cost of the first two steps. If the order is reversed, the budget is often spent where viewers cannot see it.
- Step 1: define the camera. If the camera is static or only tilts slightly, use static environment reflections; only when users can freely orbit and the page has a reflective floor should you enter the real-time reflection branch.
- Step 2: define the environment source. Prioritize one HDR environment map that matches the product tone; for indoor products, add a controllable softbox map layer rather than relying entirely on the default environment sphere.
- Step 3: define post-processing and resolution. A common approach for real-time reflection is half-resolution with blur, with update frequency limited by GPU budget; there is no need to refresh fully every frame.
Each step has a checkable acceptance criterion: in step 1, check whether the camera script includes orbiting beyond about 30 degrees; in step 2, check whether metal immediately turns black after the environment map is disabled—if so, reflection depends on a single source and a second layer is needed; in step 3, check whether the time from first screen to interactive on a low-end Android device falls within the project's acceptable range.
On delivery: instead of revising materials three times, first ask whether the camera will rotate
Teams working on web 3D projects often run into this: the client provides only phone photos, the deadline is squeezed to within a week, and the model has already been reduced to a polygon count within the typical experience range for a web budget. The initial approach is static display with an HDR environment map plus a fake reflective floor. During review, the client suddenly asks to rotate it and see the back. Once rotation starts, the reflections blur onto the floor and do not follow, so real-time reflection has to be added and polygon reduction revisited—costing an extra two or three working days and requiring materials and lighting to be redone. This kind of rework is a high-frequency item for teams that follow enterprise project delivery habits, so the safer order is: confirm whether viewers can rotate before modeling begins.
Where real-time reflection and environment map baking differ
It is clearer to compare them along the same set of dimensions. They are not a matter of one looking better than the other, but of 'who provides the reflection data' and 'whether this cost is booked to bundle size or runtime.' Below are checkable typical differences, given as ranges based on 2026 project delivery experience, not as a replacement for project-specific evaluation.
- Frame rate and heat: real-time reflection commonly takes an extra chunk of GPU time and makes mobile devices heat up more easily; using only static environment maps is usually more stable.
- Bundle size: HDR environment maps typically fall in the experience range of a few hundred KB to several MB and can be compressed and tiered; real-time reflection does not increase bundle size but increases runtime cost.
- Scheduling: adding static reflection to an existing model can produce a reviewable version in an experience range of about 1–3 working days; with real-time reflection and on-device tuning, it is common to reserve an additional 3–7 working days.
- Ceiling of effect: real-time reflection can follow the viewpoint and suits showrooms and reflective floors; static maps suit fixed-camera product displays and configurators.
- Rework risk: rework with real-time reflection is mostly about performance and jumps; rework with static maps is mostly about mismatch with scene tone and environment color being too cool or too warm.
What counts as acceptable: checkable acceptance criteria
Acceptance should not stop at 'it looks fine.' For materials like metal and glass, visual evaluation is easily affected by the screen and ambient light, so it depends more on reproducible checks. It is advisable to write down the criteria at project start according to the delivery acceptance checklist, to avoid arguments at the review meeting.
- Orbit the product a full circle; metal should not suddenly turn black or blow out to white—brightness changes should be continuous.
- Glass edges should have reasonable brightness rather than being flatly painted; moderate refraction or transmission should be visible on the back side.
- Rotate continuously for 1–2 minutes on a low-end Android device with no obvious frame drops or accumulated stutter.
- Switch to the background and back to the foreground; reflection maps should not disappear or flicker.
- Reload under weak network conditions; materials should not degrade into solid color blocks.
- When comparing color differences against the design file, check against platform color management specifications and the delivery checklist, rather than judging from a single monitor.
Applicable scenarios and boundaries
One boundary to remember first: when the product only tilts slightly on the page and viewers cannot freely orbit, adding real-time reflection is usually a waste of performance; conversely, in scenes with a reflective floor or where reflections must be viewed around the viewpoint, using only static environment maps easily gives the trick away.
- Real-time reflection is worth using: freely orbitable online showrooms, product pages with reflective floors, and cars or home appliances where shell reflection changes need to be seen.
- Real-time reflection is unnecessary: fixed-view detail pages, lightweight displays embedded in mini programs, and product pages focused on structure and copy explanation.
- Needs careful evaluation: ad channels with a high share of low-end devices, and landing pages that require the first screen to appear very quickly.
Out-of-scope boundary: If the project requires mirror inter-reflections close to offline rendering, caustics, thick-glass refraction layers, or must display multiple freely orbitable metal products on one device at the same time, web-side static environment maps alone often cannot hold up. You should return to offline rendering or split into video/pre-rendered solutions instead of continuing to add real-time reflection and forcing it.
FAQ
How long does a WebGL product display usually take from modeling to launch?
Based on 2026 project delivery habits, a simple product with only static environment reflection has an experience range of about 5–10 working days; if real-time reflection and on-device tuning are needed, it is common to reserve another 3–7 working days.
Quotes vary a lot—where does the money mainly go?
Most of the difference goes to material tuning and on-device adaptation, not modeling itself. Metal and glass must be calibrated repeatedly against real devices, and this labor often accounts for a significant share within the experience range.
Are modeling and rendering done by the same team?
A common approach is division of labor within the same team: modeling handles structure and polygon reduction, while rendering handles materials and lighting. When the two sides do not align on standards, rework often appears after handoff, so polygon reduction rules should be defined in advance.
What formats are usually delivered, and can they be embedded directly into my own webpage?
Common delivery is glTF/GLB or an engine project plus export configuration, along with texture and HDR environment files. Whether it can be embedded directly depends on your frontend framework and loading approach; it is advisable to do a small sample integration check first.
It looks blurry on mobile—is the texture resolution too low?
Not necessarily; more commonly it is over-compression or failure to tier by screen size. Metal's environment detail mainly comes from the environment map, so if the size is insufficient it easily looks blurry, with little relationship to polygon count.
If you are about to start a WebGL product 3D display, write down three things first: whether the camera will rotate, which device tiers are targeted, and the deadline and maximum number of revision rounds. With these three points, decide whether to use static environment maps or real-time reflection; this usually saves one round of rework. If the product only needs a fixed viewpoint, putting budget into model precision and lighting tone will give more direct returns.
-
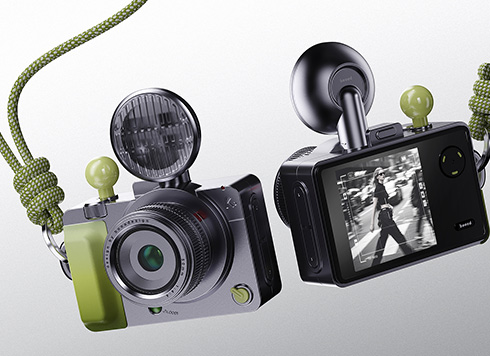 EDC·Trendy Camera Product Design: Form Follows Emotion
EDC Toy Camera: Braun-inspired retro design ...
-
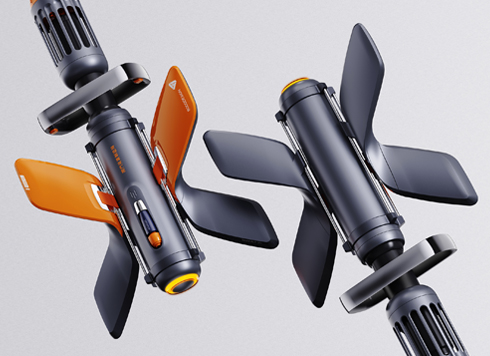 Product Design of Children's "Bubble Rocket" Underwater Thruster
Inspired by "Octonauts + Space", kids' "Bub ...
-
 Design of Adaptive Intelligent High-Altitude Shuttle Transport Robot
Smart rural shuttle bot: Streamlined, weath ...
-
 "Effortless" Exoskeleton Wear: Unleash Ultimate Freedom in the Sea
"Unfelt Wearability" & "Bionic Power" redef ...
-
After VR panorama delivery, why does the mobile view drift and why do hotspots misalign—which step usually hides the problem?
Date: Sep 20, 2026 Read: 4
-
Park plaza and street greening: tree crowns look thin up close—switch to 3D models first or unify leaf color first?
Date: Sep 19, 2026 Read: 9
-
When the CAD site plan and site photos don't match for factory landscape 3D modeling, which source should drive the model to avoid rework?
Date: Sep 17, 2026 Read: 13
-
Mini Program 3D display: the product goes black when rotated to the back—is the issue usually in baking or lighting layout?
Date: Sep 16, 2026 Read: 17
-
When a 3D bird's-eye rendering looks like a sandbox model instead of a real aerial photo, is the problem usually the camera or the scene props?
Date: Sep 15, 2026 Read: 23