

Client says the daytime view outside the floor-to-ceiling window is washed out and the room is too dark to see the furniture—should we tone down the exterior or add interior lights first to reduce rework?
Start with the conclusion: In a rendering, a washed-out white exterior and a flat, dark interior are usually not caused by one light or one sky texture being poorly adjusted. They are more often the result of three issues stacked together: an inconsistent exposure baseline, a misaligned daylight-to-artificial-light ratio, and inconsistent tone mapping. Based on common delivery experience in 2026, setting the exposure baseline and tone mapping first, then layering in environment background and adjusting artificial lights, usually reduces rework compared with directly swapping in a high-dynamic-range sky or pushing interior lights hard. If the order is reversed, teams commonly fall into back-and-forth changes where “adding the sky makes the interior darker, and adding lights makes the exterior whiter,” often adding two or three extra revision rounds.
Why renderings get an overexposed exterior and a dark interior: first separate exposure problems from light-ratio problems
In real scenes, the human eye can adapt within seconds across a range from several thousand lux outdoors to several hundred lux indoors, but a renderer cannot do that in a single exposure. A rendering faces this conflict from the start: if exposure is set for the exterior, the interior will inevitably be underexposed; if exposure is set for the interior, the exterior will inevitably be overexposed. This gap is called the light ratio, and it can commonly reach more than ten stops. Therefore, first determine whether the problem is overall exposure or the interior-exterior light ratio; the two require completely different approaches.
- Exposure problem: The whole image is too bright or too dark, exterior highlights are clipped to pure white, and shadows are packed together. Check whether either end of the histogram is clipped.
- Light-ratio problem: Clouds and building outlines are still visible outside, and materials are readable indoors, but the brightness gap between them is large and lacks transition. This is handled by layered fill lighting.
- Environment problem: The brightness of the sky texture, distant buildings, or environment HDRI does not match the scene. A common case is a background that is too bright, making the interior look gray.
- Tone-mapping problem: Linear output versus filmic, ACES, or similar mapping determines how highlights roll off. With the wrong mapping, even carefully adjusted lights can still produce dead white on one side and a flat, dark look on the other.
The test can be simple but effective: first output an ungraded original image and check whether exterior highlights retain detail and whether the wall near the window indoors shows readable material. If neither is satisfied, both exposure and light ratio have problems; do not expect a single adjustment to solve them.
Five-layer interior-exterior exposure check: which layer to start with
This method is commonly called the five-layer exposure check in projects. The idea is to split interacting factors into five layers and stack them from the bottom up. The reason for layering is that skylight, artificial light, environment, and tone mapping pull against one another in the same image. Adjusting everything at once makes it impossible to identify what broke the image; layering allows localization and rollback.
- Set the exposure baseline: Use a physical camera or equivalent parameters, place middle gray in a reasonable position first, and do not enable auto exposure. Once set, lock it and do not change it later.
- Check sunlight and skylight: Review sun intensity, sky ambient light, and incidence angle together. First ensure a reasonable amount of skylight enters the interior and that areas near the window are not crushed to black.
- Check artificial light: Divide interior fixtures by function into key and fill, unify power and color temperature, and first ensure a key-light direction and readable hierarchy before adding brightness.
- Check environment background: The brightness and color tone of the sky texture, distant buildings, and environment HDRI should be close to the interior to avoid hard breaks.
- Check tone mapping and post: Mapping method, highlight roll-off, contrast, and shadow lift come last. Do not use post to force-pull overexposed areas.
Each layer has different cautions: the first step especially suffers from repeatedly changing the baseline; once changed, all later work is wasted. The second step depends on window area and orientation; larger windows let in more light. In the third step, inconsistent color temperature makes the interior look dirty. In the fourth step, an overly bright background is a common pitfall. In the fifth step, hard pulling amplifies both dead white and dead black.
What counts as acceptable for each layer
- Exposure baseline: The histogram does not clip at either end, and exterior highlights retain detail.
- Skylight: The wall near the window shows readable material without relying on post brightening.
- Artificial light: Color temperature is consistent, and the key-light direction is identifiable.
- Environment: Background brightness is close to the interior, with natural transition.
- Tone mapping: Highlight roll-off is smooth, and shadows do not blur into a single mass.
On delivery: which step to take first when source materials are rough and the deadline is tight
In projects, clients commonly provide one phone photo of the site plus one sky image borrowed from the internet, and ask for a first version in two or three days. The constraints are practical: both the sky image and the site photo are low precision, directly swapping in a high-dynamic-range sky will mismatch the interior light, and rerendering the sky adds another round; the first-version timeline only allows one pass through the process, with no room for trial and error.
Based on delivery experience, the approach is to first decide and lock the exposure baseline with a physical camera in one pass, use a medium-intensity HDRI as the base for skylight, add artificial light in three functional levels, replace the sky with a version that has cloud detail and brightness compressed close to the interior, and only then adjust mapping and contrast.
The cost is that background assets must be reselected, commonly adding half a day to one day to the first version within the experience range; in return, revisions are often reduced from the typical three or four rounds to one or two, and the backend does not need repeated rerenders. Conversely, pushing interior lights hard first commonly makes the exterior whiter and creates hot spots on the ceiling; by the third revision, the team has to go back and reset the baseline, with both time and rework increasing. In such projects, the version that locks the baseline first usually has noticeably fewer rework cycles.
Tone down the exterior first, add interior lights first, or unify the exposure baseline first: how the three approaches differ
These are three paths often debated by clients or production teams. The basis for judgment is not which is more professional, but which side lacks content: the exterior or the interior.
- Fill in the exterior view first: Suitable when the window is pure white and there is no exterior content at all. The cost is that the interior may look darker, the light ratio remains unsolved, and a further interior pass is commonly needed; within the experience range, a single image costs about half a day to one day more.
- Add interior lights first: Suitable when the interior is genuinely dark and the exterior already has readable content. The cost is that adding too many lights loses hierarchy and makes the overall image warm; teams commonly need to roll back and adjust again, adding one to two revision rounds within the experience range.
- Unify the exposure baseline and mapping first: Suitable when both sides have problems, or for the first output. The cost is more time spent on camera and mapping, but every later change saves time; within the experience range, revisions can commonly be kept to one round, and the overall delivery cycle commonly saves about 20% to 30%.
Based on common project delivery practice in 2026, for interior-exterior scenes with large glass windows, the third approach usually offers better value; if it is only a single quick concept image with a one- or two-day turnaround, using an existing environment map plus overall color grading can also produce a deliverable version, but do not expect revisions to be easy.
Applicable scenarios and boundaries
This five-layer check is suitable for residential, commercial, and office renderings that show interior and exterior together, have large glass windows, need daylight to enter the interior, and require a higher level of realism. It is also suitable for multi-version projects that need dawn/dusk or daytime-to-dusk comparisons.
Cases that are unsuitable or do not need the full set are also stated clearly: pure interior views without windows focus on light hierarchy and do not need the five layers; large aerial scenes can use exposure balance and overall color grading, and splitting into five layers is slower; very tight budgets with only one quick concept image are better served by an existing environment map plus overall color grading, and applying the five-layer check would be overinvestment. In addition, if the client has clearly requested only a stylized look and does not require realism, there is no need to follow physical exposure criteria strictly.
Frequently asked questions
How long does it usually take to fix this kind of interior-exterior exposure problem?
For a single image, the experience range is half a day to one day; if sky and environment maps must be reselected or multiple camera angles rerendered, the typical range is one to three days.
Does fixing exposure cost extra?
Adjusting the exposure baseline and mapping within the same scene is mostly included in revision rounds; if the client changes the sky or time of day on short notice, it is commonly charged as an asset-level change, with an experience range of 10% to 30% added to the original quote.
In modeling and rendering, who is responsible for misaligned exposure?
The common division is that modeling handles geometry and base materials, while rendering handles lighting, environment, and tone mapping. Exposure belongs to the rendering stage, but sky texture precision and glass transparency are often provided by modeling or the asset side, so standards should be aligned once before delivery.
Which format is least likely to cause problems?
For single-image output, TIFF or high-quality PNG is common; confirm in advance whether a color profile is embedded. For small preview images for the client, sRGB JPG is sufficient; provide a high-bit-depth version for formal printing or large screens.
Can night renderings directly use the daytime parameter set?
No. Night scenes have different exposure baselines and different proportions of skylight and artificial light. Applying the daytime set directly commonly makes windows overly bright and the interior overly dark; a separate setup is needed.
In practice, when receiving feedback that “the exterior is white and the interior is flat,” first output an ungraded original image to check the histogram and exterior detail, then decide whether to unify the baseline or fill in the environment. For multi-camera projects, lock the baseline first and then fine-tune per camera. This approach is suitable for interior-exterior renderings that require realism and will undergo further revisions; if it is only one quick concept version or a pure interior view, simplify directly according to the boundaries above.
-
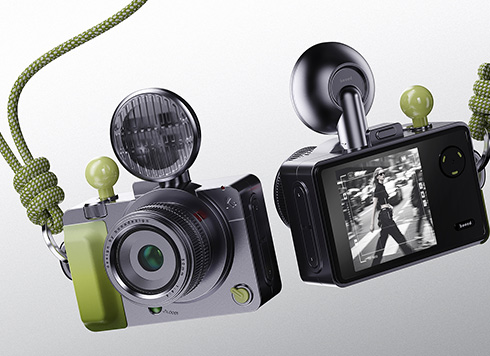 EDC·Trendy Camera Product Design: Form Follows Emotion
EDC Toy Camera: Braun-inspired retro design ...
-
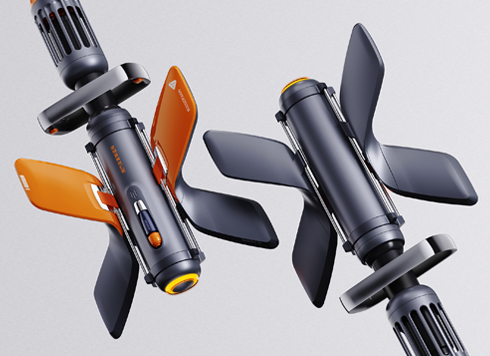 Product Design of Children's "Bubble Rocket" Underwater Thruster
Inspired by "Octonauts + Space", kids' "Bub ...
-
 Design of Adaptive Intelligent High-Altitude Shuttle Transport Robot
Smart rural shuttle bot: Streamlined, weath ...
-
 "Effortless" Exoskeleton Wear: Unleash Ultimate Freedom in the Sea
"Unfelt Wearability" & "Bionic Power" redef ...
-
Client says the sofa wood veneer blurs when zoomed in: raise the output long edge or replace close-up textures first?
Date: Nov 6, 2026 Read: 33
-
When a client only says a rendering 'feels off,' which areas should you check first?
Date: Sep 24, 2026 Read: 141
-
The daytime version of the same space is approved, but the night version keeps overexposing—is the issue usually in the lighting setup or the exposure settings?
Date: Sep 22, 2026 Read: 80
-
3D Bird's-Eye View Rendering: Why Is It Slow and Prone to Rework?
Date: Aug 13, 2026 Read: 154
-
UE5 textures blur and frames stutter late in the render while the client pushes for 4K: reduce textures first or turn off Lumen?
Date: Nov 22, 2026 Read: 6