



The daytime version of the same space is approved, but the night version keeps overexposing—is the issue usually in the lighting setup or the exposure settings?
The daytime version of the same space has already been finalized, yet the night version keeps overexposing. The common cause is not that the lights are too dim, but that the lighting layers, sky environment, exposure, and reflections have not been rebuilt for night. A common 2026 delivery practice is to reuse the model and camera while redoing lighting layers, sky, exposure, tone mapping, glass reflections, and entourage post-production. Based on project delivery experience, a single night rendering commonly takes about half a day to one day longer than the daytime version (experience range), and rework is mostly concentrated in overexposure, shadow noise, and glass reflections.
First, clarify: which layers actually change when you swap the lighting setup
Many people understand changing a daytime scene to night as “turn off the sun and turn on the lights.” If you only change the lights, the image often goes wrong first in exposure and reflections. In daytime, the main brightness comes from the sun and sky ambient light, with a high proportion of ambient light, low contrast, and cooler color temperature. At night, brightness comes from artificial light sources, emissive materials, and a small amount of sky afterglow, with high contrast, many point lights, and an overall warmer tone; warm and cool colors may also clash between streetlights and billboards. The two illuminance levels differ greatly, so it is hard for one set of physical camera parameters to suit both.
A more reliable division of work is therefore: reuse the model and camera, but create separate sets for lighting, sky, exposure, entourage, and post-production. In most projects, the following layers need to be handled separately.
- Sky and ambient light: In daytime, HDRI or a sky model provides overall ambient light. At night, ambient light must be kept very low, leaving only sky afterglow; otherwise shadows will be lifted into gray.
- Key light logic: Daytime shadows are determined by one sun direction. At night, this should change to multiple light sources, with hierarchy distinguished by brightness and color temperature.
- Exposure and tone mapping: Night scenes usually need lower exposure and more controlled highlight roll-off. Applying the daytime curve directly will blow out large areas.
- Material reflections: Glass, metal, and stone reflect very different environments at night, so reflection sources and roughness need to change accordingly.
- Entourage and post-production: Vehicles, pedestrians, tree shadows, and glows are rarely consistent between the two versions.
What can be reused, and what generally needs to be redone
Judging “whether you can just change the lighting” is essentially judging which layers are insensitive to lighting. Geometry, camera, and base textures can usually be reused, while any layer related to brightness, color temperature, reflections, or shadows generally needs to be redone. A quick inventory by “reusable / needs redo” is faster than repeatedly debating whether a redo is necessary.
- Reusable (experience range: about 60% to 80% of assets): building and interior geometry, UVs and base textures, camera position and focal length, composition crop, and base material colors.
- Very likely to need redoing: sun and sky, light fixture layout and IES, emissive intensity, exposure and tone mapping, volumetric light and glow, glass reflections, and the time-of-day feel of exterior entourage.
- Boundary items to check separately: curtain wall reflectance, billboard emissive limits, canopy light transmission in daytime vs. silhouette at night, and water reflection direction.
A common cost of reusing the model is that materials are tuned too bright or too gray for daytime, so they turn white as soon as night lighting is added. It is best to reserve a night-specific material adjustment layer.
A four-layer checklist for day and night versions
A more reliable delivery approach is to confirm four layers in sequence: time-of-day tone → lighting layers → exposure and color tone → entourage and post-production, finalizing each layer before moving to the next. The reason for this split is that night-scene rework can almost always be traced to one layer not being locked down; the earlier it is locked, the more time is saved.
- Time-of-day tone: First decide whether it is blue-hour evening, late night, or dusk turning to night, establish the sky color temperature and overall illuminance feel, then adjust the lights.
- Lighting layers: Group ambient light, key lights, fill lights, emissive materials, and decorative light strips so brightness can be adjusted individually without re-rendering everything.
- Exposure and color tone: Set a baseline with physical camera exposure first, then control highlight roll-off and shadow lift separately to avoid brightening the whole image.
- Entourage and post-production: Add car lights, human silhouettes, glows, and unified color tone last, but do not add light in post that should have been created in 3D.
Each layer has different watch-outs: if the time-of-day tone is off, no later adjustment will keep it from looking like “daytime with the lights turned off.” If lighting is not layered, one client comment like “make the key light a little darker” can trigger a full re-render.
Where night-scene production time actually goes
In corporate project delivery, approval submissions and leasing/investment promotion often require images at the same time—daytime for approval and night views for promotion—while the schedule gives only one window. The constraint is often producing two versions within a few days from an already-confirmed model. The approach is to lock the camera and composition first, finalize the daytime lighting and exposure using the four-layer checklist, then build the night version on top of the daytime version by changing the sky, reducing ambient light, and adding artificial light sources, with materials adjusted only for reflections and roughness. Most projects can be delivered on schedule, but the cost is that total night lighting is several times that of daytime, so more time must be reserved for debugging and rework. If this scheduling step is missed, a common result is still fighting overexposure and noise the night before delivery. Reserve this scheduling buffer according to the experience range, not by directly extrapolating from the daytime version.
Several points where night renderings often fail
The problem with night scenes is often not that “the lights are not bright enough,” but that the relationship between light and dark is not controlled. If two or more of the following symptoms appear at the same time, it usually means returning to 3D for adjustment rather than forcing it down in post.
- Blown-out patches: Large areas of pure white with no detail appear in light strips, billboards, or windows, indicating that highlight roll-off and emissive limits are not set properly.
- Shadows are dead black or gray: Dead black is often related to insufficient indirect light bounce, while gray is often related to ambient light not being pushed low enough; the fixes go in opposite directions.
- Noise cannot be suppressed: Night light sources are small, so insufficient sampling creates grain; using post-production denoising alone will wipe out detail along with it.
- Glass reflections look fake: The reflections still show daytime sky or repeated textures; night scenes should switch to a night environment and interior lights.
- Entourage has no shadows: People and cars lack contact shadows or their shadow direction is wrong, creating an obvious pasted-on look.
How to judge whether a daytime or night version is acceptable
Acceptance can be based on checkable items rather than feeling alone. The pass line is usually set at “highlights retain detail, shadows retain gradation, and the primary and secondary light sources are understandable at a glance,” not at how busy the image looks.
- Daytime: Sun direction and cast shadows are consistent, glass reflections contain sky content, shadows are not forced brighter in post, and building edges show no obvious aliasing.
- Night: Bright areas are not smeared into white, materials remain readable in shadows, key lights and decorative lights have clear hierarchy, and people and vehicles have contact shadows.
- Consistency between the two versions: Camera position, composition ratio, and building outline match so the client can see that it is the same scheme at different times.
- Checkable evidence: Before delivery, verify item by item against the project acceptance checklist that light source direction, color temperature range, exposure settings, and texture paths are complete.
Suitable scenarios and boundaries
“Reuse the model, redo the lighting” suits presentation scenarios where a basic model already exists and the same space needs multiple time-of-day moods. If the client only needs one daytime image, there is no need to redo lighting layers and exposure separately for night; conversely, if the project is positioned around night scenes, the daytime version does not need to be forced into a complete build either.
- Suitable: Scheme approval plus leasing/investment promotion, multi-scene display for sales offices or exhibition halls, day-and-night comparison for the same space, and shots that will later be animated.
- Not necessary: Concept stages that only need one indicative image, budgets and schedules that allow only one version, or clients with no clear requirement for time-of-day mood.
- Boundaries that lengthen the schedule: When there are many light fixtures, large glass curtain wall areas, or a need for realistic reflections and volumetric light, the adjustment workload per image rises noticeably, so the schedule should reserve more buffer according to the experience range.
Frequently asked questions
For the same model, how much longer does the night version usually take than the daytime version?
By experience range, the night version usually takes about half a day to one day longer than the daytime version; with many light fixtures or large curtain wall areas, it may take another one to two days, mainly spent on lighting layers and noise debugging.
What drives the quote difference—the model or the lighting?
The price difference mostly comes from lighting and post-production, not the model. The model can be reused; the added night work—light fixture layout, reflection debugging, and extra rendering rounds—is the main reason the quote rises. Check the specifics per project.
Can we finalize the daytime version first and add the night version later?
Yes, but lock the camera and composition first. If the camera angle or floor plan changes after the daytime version is finalized, the night version will generally need to be re-rendered along with it, significantly increasing rework.
Is delivery two JPGs, or are layered files required?
A common practice is to deliver JPGs plus layered source files or project files. If the client later needs to fine-tune lighting color or local materials, having layered files usually saves a full re-render round.
If we only change the lighting color, can we avoid re-rendering?
Minor color temperature adjustments can be done in layered color grading; when fixture positions, brightness hierarchy, or reflection content are involved, it usually requires returning to 3D for re-rendering, otherwise the light ratio will be wrong.
When the same space needs both daytime and night versions, it is advisable to lock the camera and time-of-day tone first, then proceed with the four-layer checklist. Approval images and leasing/investment promotion images do not have to be fully produced in one pass; producing one main image first makes it easier to converge on direction. When night lighting and reflection requirements are clearly greater than daytime, reserve more buffer in the schedule according to the experience range to reduce repeated rework before delivery.
-
 EDC·Trendy Camera Product Design: Form Follows Emotion
EDC Toy Camera: Braun-inspired retro design ...
-
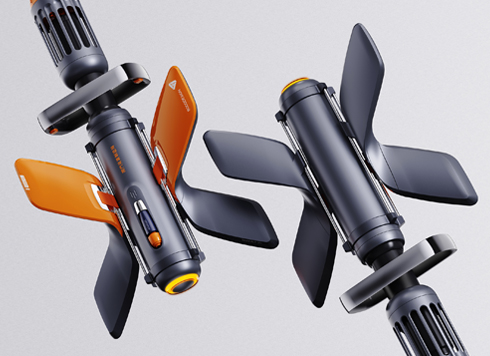 Product Design of Children's "Bubble Rocket" Underwater Thruster
Inspired by "Octonauts + Space", kids' "Bub ...
-
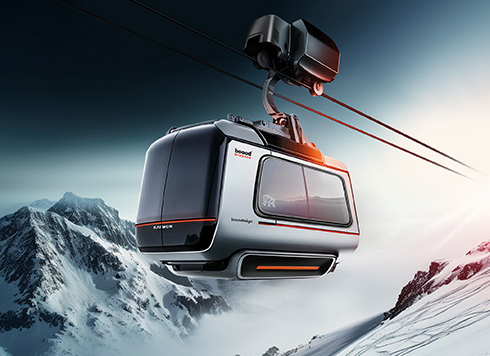 Design of Adaptive Intelligent High-Altitude Shuttle Transport Robot
Smart rural shuttle bot: Streamlined, weath ...
-
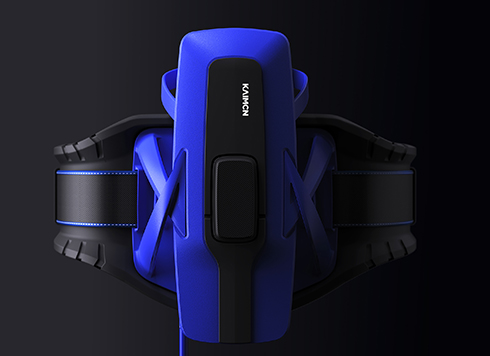 "Effortless" Exoskeleton Wear: Unleash Ultimate Freedom in the Sea
"Unfelt Wearability" & "Bionic Power" redef ...
-
When a client only says a rendering 'feels off,' which areas should you check first?
Date: Sep 24, 2026 Read: 99
-
3D Bird's-Eye View Rendering: Why Is It Slow and Prone to Rework?
Date: Aug 13, 2026 Read: 107
-
Why does mini-program 3D start smooth on a budget Android phone but get hot and drop frames after two minutes?
Date: Oct 14, 2026 Read: 7
-
In product demo animation, prototype still frames look premium, but the final video moves like PPT slides—should you add motion previews first or increase render precision?
Date: Oct 13, 2026 Read: 10
-
In web 3D, glass curtain walls and railings flicker at oblique angles—should you merge coplanar geometry first or adjust the camera near/far clipping planes first?
Date: Oct 12, 2026 Read: 19