



After web 3D launch, why does the design look bright but the client's phone look gray and dark?
Conclusion: After a web 3D launch, when colors look gray and dark, it is usually not a broken client phone screen, nor a single wrong rendering setting, but rather at least one part of the pipeline—asset color space, engine color management, tone mapping and exposure, and browser display device—not using a unified standard. Check each item first; that can distinguish a widespread rendering deviation from a difference on an individual device. For the former, fix the project itself; for the latter, provide compatibility notes.
Why does web 3D color change from one device to another?
Web 3D differs from a static mockup: the final pixels are calculated in real time by the browser and the user's device GPU, and are affected by color space, screen gamut, brightness, and system color management. Under a unified sRGB standard, differences are usually small; once texture and output standards are inconsistent, grayness and dark-area compression are amplified. In 2026 project delivery, a common practice is to manage textures as sRGB, calculate materials in linear space, convert output back to sRGB, and use fixed tone mapping and exposure levels as the baseline. When the baseline is unstable, device A looks normal and device B looks gray, and teams easily misdiagnose it as a monitor problem.
- Texture color space tagged incorrectly: The base color texture is read as linear, making colors look gray and bright.
- Tone mapping not unified: Different exposure and curves cause inconsistent dark-area compression.
- Simplified mobile lighting: Changes in ambient and indirect light reduce contrast.
- Browser and system gamut differences: When a wide-gamut screen is not mapped correctly, colors look overly saturated or gray.
The four-stage color pipeline check
The reason to split troubleshooting into four stages is to avoid re-rendering right away. The order starts with the parts the project controls and gradually moves to the device side; the first two stages solve most widespread grayness, while the last two stages explain differences on individual devices.
- Asset stage: Check the color space tags for base color, normal, roughness, and metallic textures, and confirm whether the output format and compression introduce color shifts.
- Engine stage: Confirm whether color management switches, the linear workflow, and output conversion are unified, and whether material nodes mix two different standards.
- Output stage: Fix one set of tone mapping, exposure, and lighting intensity as the acceptance baseline, and do not change it temporarily for each device.
- Device stage: Open the same standard scene in the baseline browser and target mobile devices, and record whether it looks gray overall or dark only in certain areas.
A pass/fail standard can be judged reproducibly: if the same project produces consistent results in the baseline browser and on the baseline monitor, the first three stages are basically closed-loop; if only one device looks gray, suspect device gamut, brightness, or browser color management first, not the project file itself.
How can you tell whether it is a display difference or an actual rendering error?
The standard is not the subjective feeling that it 'looks dark,' but a comparable range of deviation. An experienced approach is to first build a reference scene with neutral gray, bright metal, and dark fabric, take screenshots at baseline settings, and then compare on other devices; with a reference object, judgment is less likely to be swayed by the look of a single screen.
- Overall grayness and reduced contrast: This is often caused by inconsistent color space or tone mapping standards, and belongs to the project side.
- Only dark-area detail is lost: Check exposure and indirect light first, then device brightness and system power-saving settings.
- Localized color shift in a fixed position: Check texture color space tags and the compression pipeline first.
Spot-check standards can be guided by an experience range: if the overall brightness difference for the same scene across two or three devices is within an acceptable range, there is usually no need to change the project; if dark-area detail is unreadable, or the client clearly states that it deviates noticeably from the design mockup, go back to the output stage and reset the baseline rather than trying different lighting parameters back and forth.
Where delivery often gets stuck: a web 3D rework scenario
A common situation: the client wants web 3D to showcase a product, with a limited budget and a timeline compressed to one or two weeks; modeling and texturing are delivered by different people, and some textures are exported directly from design software. The constraints are that the mobile first screen must load and the materials must look close to the mockup. A common approach is to first convert textures uniformly to sRGB, re-identify them in a linear workflow, and then fix tone mapping and exposure levels to produce baseline screenshots. The cost is an extra half day to one day of upfront checking, but it avoids being asked after launch to re-upload textures and re-export the scene because the overall look is gray; the typical range for this kind of rework is two to five days, and it may delay the campaign launch date.
Another situation is that the client views it on a wide-gamut screen, finds it too saturated, and asks the team to darken everything; directly changing project exposure will darken other devices as well. It is usually more stable to first provide baseline screenshots and an explanation of the differences, then decide whether to add device-side compatibility.
Choosing between two fixes: correct the project pipeline or add device-side compatibility
For gray and dark issues, the path roughly falls into two types: project pipeline correction and device-side compatibility notes. The former fixes the root cause, at the cost of re-exporting and regression testing; the latter leaves assets untouched and only handles device differences, at the cost of accepting limited differences across terminals.
- Option A, project pipeline correction: Check color space, unify tone mapping and exposure, and produce new baseline images. Suitable when most devices look gray, or when there is a clear deviation from the design mockup; the experience timeline is about 1 to 3 working days, depending on scene complexity.
- Option B, device-side compatibility and notes: Keep the existing project, add notes on device brightness and environment settings, and attach baseline screenshots and viewing instructions. Suitable when only a few devices look gray and the overall result is still within an acceptable range; the experience timeline is about half a day to 1 working day.
- Shared acceptance standard: For the same baseline scene on the baseline browser and target mobile devices, overall brightness and dark-area detail can be compared, and the client knows which device defines the baseline.
The cost of choosing the wrong path differs: treating device differences as a rendering error easily leads to repeatedly changing lights and materials; treating widespread grayness as a screen problem means receiving the same feedback continuously after launch, and eventually still having to redo assets and output standards.
When it applies and when it does not
This checking method fits web 3D projects that need cross-device display, such as product showcases, campus walkthroughs, and mini-program 3D interactions, especially when the client views on multiple terminals and requires color consistency. It solves whether the same content behaves in a controllable way across devices, not whether every terminal can be adjusted to look exactly the same.
- Suitable: Web 3D projects that will launch in browsers or mobile apps, have materials and lighting, and require remote client acceptance.
- Suitable: Situations where cross-device grayness or darkness has already appeared, but it is unclear whether the issue belongs to the project or the device.
- Not suitable: Projects that only produce offline single-frame renders and do not involve a real-time rendering pipeline.
- Not necessary: One-off promotional pages, very light models, and displays mainly using flat colors with low requirements for color consistency.
- Boundary note: Differences in device gamut, brightness, and system settings on the client side cannot be completely eliminated; what web 3D can do is keep the differences within a range that does not affect judgment.
FAQ
If web 3D colors look gray, do you have to re-render everything?
Not necessarily. Check texture color space and output standards first; most widespread grayness can be fixed early. Only when an asset-layer error is confirmed do you need to re-export and run regression checks; a full-package re-render is not always required.
What files should a web 3D delivery include so color issues are less likely after launch?
A common delivery includes models, textures, project files, baseline screenshots, and opening instructions; the key is texture color space tags and records of baseline settings, so the other party can reproduce the same look.
How long does a web 3D launch usually take, and how many days does color checking take?
Based on 2026 project delivery experience, a medium-complexity scene commonly takes two to four weeks from assets to launch; color and output standards checking usually takes half a day to two days, depending on whether the source materials are well organized.
If the client says the color is wrong, should I adjust the lighting first?
It is not advisable to change lights right away. First confirm whether it is overall grayness, lost dark-area detail, or an abnormal local material, then address color space, exposure, or texture compression accordingly; adjusting lights directly can easily carry the problem to other devices.
In action, making one baseline screenshot and labeling the device and settings, then checking the four-stage pipeline, is a relatively low-cost step for web 3D color issues. If the project only requires standalone display and the materials are simple, there is no need to roll out the full check; if it has entered multi-terminal delivery, it is advisable to write this into the acceptance checklist to reduce repeated communication after launch.
-
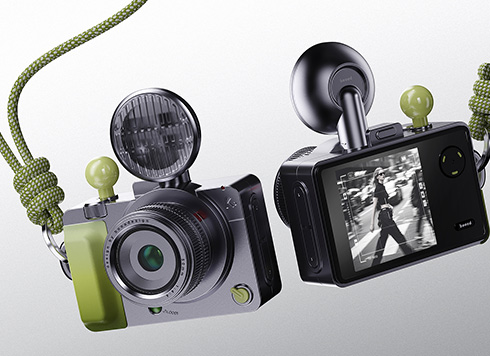 EDC·Trendy Camera Product Design: Form Follows Emotion
EDC Toy Camera: Braun-inspired retro design ...
-
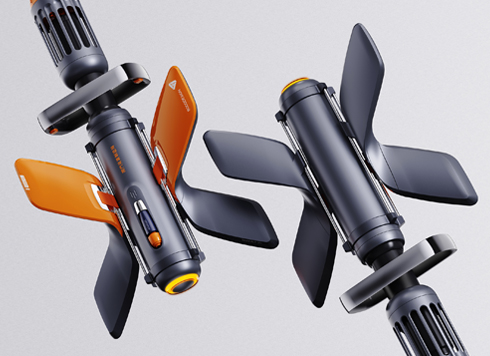 Product Design of Children's "Bubble Rocket" Underwater Thruster
Inspired by "Octonauts + Space", kids' "Bub ...
-
 Design of Adaptive Intelligent High-Altitude Shuttle Transport Robot
Smart rural shuttle bot: Streamlined, weath ...
-
 "Effortless" Exoskeleton Wear: Unleash Ultimate Freedom in the Sea
"Unfelt Wearability" & "Bionic Power" redef ...
-
After VR panorama delivery, why does the mobile view drift and why do hotspots misalign—which step usually hides the problem?
Date: Sep 20, 2026 Read: 5
-
Park plaza and street greening: tree crowns look thin up close—switch to 3D models first or unify leaf color first?
Date: Sep 19, 2026 Read: 9
-
WebGL product 3D display: metal and glass keep looking like plastic—bake environment maps first or use real-time reflections to avoid rework?
Date: Sep 18, 2026 Read: 15
-
When the CAD site plan and site photos don't match for factory landscape 3D modeling, which source should drive the model to avoid rework?
Date: Sep 17, 2026 Read: 14
-
Mini Program 3D display: the product goes black when rotated to the back—is the issue usually in baking or lighting layout?
Date: Sep 16, 2026 Read: 18